Let’s Write a Game Boy Emulator in Python
There’s a lot to be said for staid, old gaming platforms from the 1980s and 90s. Chief among them is nostalgia – if you’re old enough to remember them, that is – and a fondness for a time when both gaming and computer hardware were simpler and easier to understand.
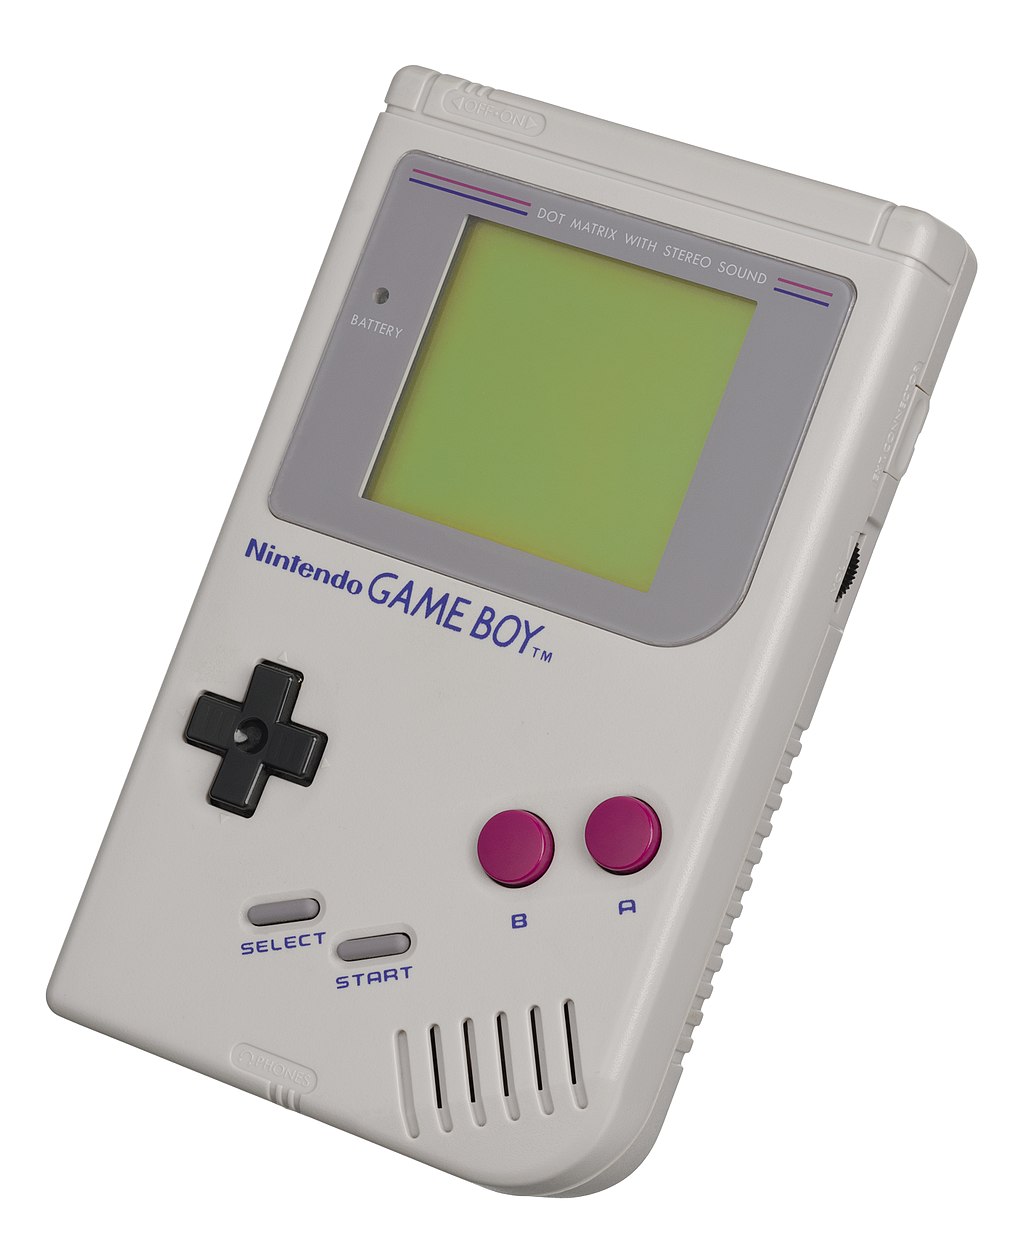
But for those of you who don’t know, the Game Boy is an iconic, portable gaming device designed to play computer games using cartridges you slot into the back of the device. The original Game Boy had a monochrome display; an 8-bit Z80-style CPU with 4.194304 MHz; a whopping 8 KiB of working RAM and 8 KiB of video RAM; and 4 stereo sound channels. It also had a Liquid-Crystal Display (LCD) screen, a directional game pad and a couple of keys action keys. Popular games included Super Mario, Tetris and, of course, Pokémon.
And in this course I’m going to teach you how to write a Game Boy emulator in Python.
What’s an Emulator?
Let’s briefly talk about what an emulator is. In our case, the Game Boy emulator we’ll write will mimic as many of the components that make up the Game Boy as we need to, to make it work. But, there’s a lot of obscured context to that statement: what does it mean to mimic something? How do you simulate the intricacies of an LCD — and do you even try or just settle for drawing stuff to your screen? What about the CPU, the RAM and the physical buttons? What about the cartridges that hold the games?
The determination of what is a good or bad emulator comes down to careful trade-offs. It’s not always feasible (or useful) to perfectly render unto your host system every hardware quirk or software foible the source system has. There are also other considerations such as whether the host system is even capable of accurately emulating it in the first place.
So the job of an emulator writer is picking your battles and conceding that some things (certain games, in our case) cannot be made to work without a disproportionate amount of work versus what the return on that investment is. The intricacies of how the different pieces of hardware interacted with each other, and the extreme lengths the programmers went through to eke out every cycle of performance, means there’s an awful lot of obscure behavior that you must implement if you truly want a cycle-accurate emulator. Now, I will not be striving for that level of emulation as the educational “return on investment” drops sharply.
A cycle-accurate emulator attempts to mimic the characteristics of the original system such that the timings of the emulated system hews as close to the real system as possible. Achieving this level of emulation is required for some games and applications, but not all.
But saying that, how these intricate components interact is absolutely something we’ll encounter: there are many edge cases and design quirks where we’ll have to weigh the benefits of trying to accurately mirror what the real system does, in lieu of simply proclaiming it “good enough” and moving on.
As this is an educational course the main focus is teaching the concepts that result in a passable emulator capable of running some Game Boy cartridges. So even if you are not prima facie interested in the Game Boy, the lessons you’ll learn from following the course will leave with a deep understanding of software and systems programming nonetheless.
Intended Audience
You don’t need to be an expert in Python nor systems programming to have a go at this. The entirety of the course is designed to gently introduce each concept that you’ll work on. That does not mean you’ll sit down and knock this out in a weekend even if you are; it’s a pretty large undertaking, but thankfully one where the payout is the experience of building the emulator.
What You’ll Learn
- CPU Design and CPU Architecture
-
The Z80-style CPU is very similar to the foundational 8080 CPU design that modern Intel CPUs can trace their lineage back to. Although the Z80 is similar to the CPU in the Game Boy, it is not entirely the same: it’s most likely an Intel 8080-style Sharp CPU called LR35902, but I will instead use the term Z80 even though it’s not 100% truthful. The reason for that is there’s scant documentation for the Sharp CPU on the internet except references to just the Game Boy. The Z80 – even though it is different in a number of ways from the Sharp – is reasonably similar and has a very large body of documentation online.
Modern CPUs are, of course, fantastically complex; but the old Z80 is not, which makes it perfect for understanding the fundaments of how a CPU actually works.
You’ll write a full-fledged “CPU” in Python with registers, flags, memory controller, instruction execution, and much more.
- Assembly Language Programming
-
You’ll walk away with a good understanding of Z80 assembly language (and by extension general concepts still in use today) and how it underpins literally everything we do today. A register-based CPU is most likely what powers the computer that you are reading this on, and knowing enough about assembly language to cogently reason about how machine code is decoded and executed by the CPU will serve you well.
- How to write a Disassembler
-
If an assembler turns assembly language into machine code that a CPU can understand, the disassembler does the reverse: it turns machine code back into assembly. As part of your work on the emulator, you’ll need to do this as you methodically work your way through the CPU specification or to debug issues that will crop up during its development.
- Interrupt Handling
-
Ask yourself what happens when you press the key on the Game Boy’s game pad? How does a physical button press manifest itself as something actionable for the CPU that is busy executing the code that makes up a computer game? The answer to that (and many other events) is the interrupt handler, another core part of systems programming that allow for event handling in a CPU that is otherwise entirely bereft of concurrency.
- Interactive Debugger
-
You’ll write an interactive debugger capable of stepping through each machine code instruction; evaluate simple expressions like viewing memory or registers; place breakpoints when certain parts of the code is reached; and more.
- Bit manipulation (or “bit twiddling”)
-
Ask yourself how a computer that only understands 0s and 1s can comprehend the number 2? How does it add another number to that number, and what does it mean that a CPU can only operate on 8-bit or 16-bit numbers? At the end of the course you’ll have a solid understanding of binary numbers; how CPUs add, subtract and represent both signed and unsigned numbers; how to “bit manipulate” binary numbers to do things like set or reset flags in bitfields; and the perplexing etymology of Gulliver’s Travels and CPU endianness.
- Vertical Blanking, Blitting, Scrolling and Sprites
-
Drawing stuff to a screen is a carefully choreographed ballet between the CPU, the memory and the display and its display controller. Get it wrong on real hardware and you’ll print only garbage or even damage it! Luckily that is no concern in an emulator, and yet you’ll still have to understand screen blanking; blitting to a screen; and how the Game Boy scrolls the screen and displays moving graphics.
- Performance Profiling and Code Optimization
-
Python is… not fast. And you would be surprised to hear that even semi-accurately simulating a humble 4.19 MHz CPU will take its toll on yours! So once it’s all said and done, you’ll learn some tricks of the trade to speed things up a bit.
- Python
-
I would be remiss if I did not include this. Throughout the course I intend to show you how I would develop key parts of the emulator with testability and good design in mind. I will use Python 3.10’s match-case pattern matching as it has a number of tantalizing use cases, and there’s a lot to be said here for separation of concerns — a critical concept when you have to develop a complex web of components that must nevertheless be written and tested independently.
Goals & Non-Goals
Let’s talk about goals and also non-goals. The end goal is a functioning Game Boy emulator and a debug suite to aid in developing it further; but it’s the journey more-so than the destination. There’s a lot of really cool concepts and techniques you’ll learn along the way. Finishing a project feels good, but this is an undertaking where every percentage point of incrementation beyond 70-80% complete will take more and more time as you’ll have to get a lot of complex timings and design quirks right to progress. The end goal for me, then, is to take us as far as we can go and still extract fun and learning out of it, which falls well short of cycle-accuracy. But that should not discourage you: once you have a good understanding of how the mechanics of Game Boy emulation works, you should have the tools and knowledge needed to take things further yourself.
So, in short:
- Emphasis on Readability over Performance
-
The code I write will emphasize readability and not performance. It’s far too easy to get caught up in needless performance optimizations when you do not yet understand where or what the bottlenecks are likely to be.
Course Plan
There’s fair bit of required reading if you want to write a Game Boy emulator, but the prevailing documentation on the subject – although very good – does assume a level of fluency in systems programming that I will of course explain first.
So the plan is, roughly, as follows:
-
Introduction (that’s what you’re reading right now)
-
What is a Game Boy and what is an Emulator
-
Recommended and Required Resources
-
Reading Opcodes from the Opcode JSON
-
-
Understanding Opcodes and Operands
-
How to read and implement opcodes and operands
-
Writing a basic disassembler (and our future decoder)
-
What’s a Cartridge ROM?
-
Reading the metadata from a Cartridge
-
-
Writing the Python skeleton of a Z-80 CPU
-
The Program Counter
-
Registers and Flags
-
Basics of Bit Twiddling
-
-
The Memory Banks and Memory Controller
-
Writing an Interactive Debugger
-
Implementing some of the basic CPU opcodes
-
Bit Twiddling and manipulating Numbers
-
The ALU and arithmetic opcodes
-
Interrupt Handling
-
Graphics, tile maps, backgrounds and the display
-
Joypad and Memory Bank Switching
-
Performance Optimizations
-
Sound
Recommended and Required Resources
You cannot write a Game Boy emulator in a vacuum. This course stands on the shoulders of giants. There’s a large body of enthusiast-made documentation for all the various incarnations of the Game Boy. The Game Boy has been painstakingly reverse-engineered over many, many years into a collection of documentation and resources that we can draw on.
There are also many other Game Boy emulators and there is no shame in having a peek at how they do things if you are stuck. And you will get stuck. Once you’re further along you’ll have no problems divining how these other emulator implementations work and you can quickly check if your understanding is correct.
I will include code samples that roughly match the level of progress at each stage we progress to, but with the caveat that like all half-finished things, it will of course never be a 100% correct reference implementation – you only really reach that stage at the end – but it should serve well as a reference or starting point for you. Each incrementation brings changes, fixes, and changes as we collectively grow our understanding of the Game Boy and its internals.
Required Resources
I should start out by listing the Game Boy Development Community as it’s a fantastic site on pretty much every part of Game Boy. A lot of the information you see below can also be found linked to from somewhere in the GBDC link above.
Technical References
The Pan Docs is an excellent technical reference for all aspects of the Game Boy. This is one of two primary sources of documentation we’ll use. I will refer to this frequently.
I strongly urge you to skim it to get a feel for how the contents are laid out and what writing a Game Boy emulator entails. But don’t let the overwhelming number of concepts, terms and things you need to do discourage you, though, as we’ll progress through it piecemeal, one step at a time.
Another great reference manual is the Game Boy CPU Manual. It contains more detailed descriptions of, especially, the CPU opcodes and how various aspects of the systems interact. You should read and bookmark both. As the latter is a PDF without hyperlinks I recommend you print it out. Note, though, there are some inaccuracies in the document; you’re encouraged to cross-reference the information with the Complete Technical Reference.
The Game Boy: Complete Technical Reference is another resource, and it is also very good, with a special focus on the memory banks (which you need not worry about for a while) and CPU instructions.
The Cycle-Accurate Game Boy Docs, despite its author’s claim that it’s “old and unmaintained”, is in fact still a useful and relevant reference manual.
Opcode Reference
There’s a Periodic table of Game Boy CPU Instructions which is an interesting way of displaying the same information you’d find in the technical references I listed above. What it is very useful for is the JSON download of the same; I’ll use it later to automate a lot of the tedium of writing a disassembler.
Cartridge ROMS
The excellent Homebrew Hub is full of games, demos, and all manner of cool ROMs for you to experiment with. It goes without saying I cannot tell you how to download game boy cartridge ROMs that you may have played back in the day as that is, of course, copyright infringement; but there’s nevertheless a large body of free ROMs for you to experiment with.
Emulators
There are many emulators for the Game Boy of varying stages of hardware accuracy and features. For developing a Game Boy emulator I recommend you look at BGB as it has an excellent debugger. I can confirm that it runs very well on Windows and with WINE on Linux.
Optional but Useful Resources
Assembler & Opcode Manuals
The RGBASM Documentation and the Rednex Game Boy Development System are useful if you want to write assembly language roms for the Game Boy. If you want to test out certain CPU instructions with a real ROM you can. The documentation is a fine primer on assembly language programming for the Game Boy.
Sprites and Tiles
The Game Boy Graphics Renderer is useful, much later on, if you want to check if your sprite and tile graphics implementation is correct. You can feed it a string of bytes and it’ll tell you what it would look like graphically.
Reading and Parsing Opcodes and Operands
Opcodes and Operands
An opcode is the action the CPU must carry out against the opcode’s operands, if any. So if 1 + 2 is an instruction to a human, the opcode would be + to a CPU, and 1 and 2 the opcode’s operands.
All the code you write will, one way or another, reduce itself to a set of instructions the CPU you are running the code on can understand. How many steps that takes depends on the language and tooling you use: write assembly language and the gap is small; write Python and it’s a yawning chasm. In many ways an interpreted language like Python is similar to a CPU in that the interpreter mimics much of the architecture that makes up a computer in order to provide a “unified” environment where you can write your code once, and reasonably assume it’ll run where the interpreter runs.
Thus the benefit of an interpreted language is that if you can write the interpreter and make it work on esoteric computer hardware then you can expect the much larger body of work written for the interpreter to run also. Python specifically is run on a virtual machine which I think is rather telling.
Consider this snippet of code:
>>> def add(a, b):
        return a + b
>>> import dis
>>> dis.dis(add)
  2           0 LOAD_FAST                0 (a)
              2 LOAD_FAST                1 (b)
              4 BINARY_ADD
              6 RETURN_VALUE
                ^--- Mnemonic            ^^^^^ Argument
              ^--- Offset
Using the dis module I can run any object through its dis.dis() function and disassemble the object into its constituent instructions. Though the terms Python uses is not a perfect one-to-one to how the Z80 CPU looks at things, I think it’s a reasonable facsimile. I recommend you disassemble a few things in Python to get a feel for how your code is understood by Python’s VM. Note that the dis.dis function does not show the opcode, but dis.get_instructions() does.
Likewise, you can ask Python to give you the byte-compiled code of our function add:
>>> add.__code__.co_code
b'|\x00|\x01\x17\x00S\x00'Sort of, I must point out that Python’s bytecode has all manner of allowances in its implementation to support the dynamic nature of Python. That means the reified bytecode is not a 100% mirror of the source code. That is not a problem with the Z80 though.
The bytecode is the condensed representation of our code and so it is with Game Boy Cartridge ROMs. The cartridge ROMs also store the data – graphics, music, and so on – and you wouldn’t necessarily be able to tell code from data in their raw byte form.
If you pick out a byte from a ROM that has the value 144 — how do you know it’s code or one tiny fragment of a piece of music?
Getting the Opcode Metadata
The Z80 that we’ll be emulating has around 500 instructions. That might sound like a lot, but most of them are variations of each other and we can knock out handfuls at a time with some clever thinking.
OK, so we’ll want a complete list of opcodes. The disassembled code you saw above is a fairly typical representation of how these things are written out for human consumption. It’ll usually look a bit like this:
<addr> <opcode> <mnemonic> [<operand> ...] [; commentary ]
The addr is the memory address where the instruction is located – we can ignore that for now – and the opcode and mnemonic you now know; the list of operand entries is optional, as not all opcodes have them, but we’ll show them if they’re there. Finally there’s a commentary with the ; indicating a comment.
I recommend you download the JSON from OpCode Table and use that. You don’t have to: you can certainly copy the instructions you see either in the table or in one of the reference manuals.
The Opcode JSON is broken down into two major sections: cbprefixed and unprefixed. For now, I recommend you treat each as a distinct segment of opcodes. There’s a good reason for that, and we’ll talk at length about the structure of an opcode in a ROM and how to read them later. For now, the only goal is to take this structured JSON file and turn it into something you can easily query in Python.
Either key is itself a dictionary of { opcode_1: details_1, ..., opcode_n: details_n }, like so:
"0xFF": {
          "flags": {
              "C": "-",
              "H": "-",
              "N": "-",
              "Z": "-"
          },
          "immediate": true,
          "operands": [
              {
                  "immediate": true,
                  "name": "38H"
              }
          ],
          "cycles": [
              16
          ],
          "bytes": 1,
          "mnemonic": "RST"
}
This is one instruction with the mnemonic RST. Can you pick out the information you need to write the human-readable form using the template I wrote earlier?
Instruction and Operand Dataclasses
Parsing this file should be a zinch. You can definitely keep the format as it is; it’s sufficiently detailed to make it readable for humans.
However, I prefer dataclasses for this:
from dataclasses import dataclass
from typing import Literal

@dataclass(frozen=True)
class Operand:

    immediate: bool
    name: str
    bytes: int
    value: int | None
    adjust: Literal["+", "-"] | None

    def create(self, value):
        return Operand(immediate=self.immediate,
                       name=self.name,
                       bytes=self.bytes,
                       value=value,
                       adjust=self.adjust)

@dataclass
class Instruction:

    opcode: int
    immediate: bool
    operands: list[Operand]
    cycles: list[int]
    bytes: int
    mnemonic: str
    comment: str = ""

    def create(self, operands):
        return Instruction(opcode=self.opcode,
                           immediate=self.immediate,
                           operands=operands,
                           cycles=self.cycles,
                           bytes=self.bytes,
                           mnemonic=self.mnemonic)
Hexadecimals in Python
Unfamiliar with hexadecimals? No problem. A quick crash course. (And we’ll talk about binary, too, later on as it’s far more important!)
You may have seen that the keys in that opcode dict are strings like this: "0xFF". Hexadecimals use a base of 16, as opposed to decimal (base 10) or binary (base 2). In binary you count with 0 and 1; in decimal with 0 through to 9; and hexadecimal is 0 through 9, then A to F to yield a “number” sequence like so: 0123456789ABCDEF.
Hexadecimals are typically prefixed with 0x (or $ in Z80 lingo, but Python does not recognize that notation), and binary with 0b. Try it out in Python:
>>> 0xFF
255
>>> 0b1111_1111
255
>>> hex(255)
'0xff'
>>> bin(255)
'0b11111111'
One byte can represent 0-255 which is the same as 0x0-0xFF. Each byte is 8 bits, and commonly divided into two nibbles of 4 bits each:
>>> 0b0000_1111
15
>>> hex(15)
'0xf'
>>> 0xF
15
Yep, you can cram _ into numbers, including hexadecimal and binary notation, as a visual aid. Pretty cool, huh?
The two nibbles are usually called “high” and “low”. Which one is high or low – the left or the right side – comes down to the CPU’s endianness, a topic we’ll discuss later when we talk about binary numbers in earnest.
There is no reason to use hexadecimals except that makes it easier for humans to reason about binary numbers, ironically enough, because hexadecimals, bytes, bits and nibbles are all powers of two: 2, 4, 8, 16.
Now because the Z80 is an 8-bit CPU (with some 16-bit support for arithmetic and addressing) you will need to deal with nibbles, bits and (up to) 2 bytes at a time. Hexadecimals make it easier, but you are free to use decimals if you prefer!
Parsing the Opcodes
So back to the opcode parser. We’ve seen that there are string representations of the opcodes as hexadecimal values. But we need to parse them first. Luckily Python can do this for us:
>>> int("0xFF", base=16)
255
The int() function takes an optional base and it’s able to understand its own notation, too:
>>> int("0b0110111", base=2)
55
So that should take care of that problem.
All said and done, I now have two dictionaries containing each unique set of instructions:
>>> instructions[0xFF]
Instruction(opcode=255, immediate=True, operands=[
    Operand(immediate=True, name='38H', bytes=None, value=None, adjust=None)
    ], cycles=[16], bytes=1, mnemonic='RST', comment='')
With that I can quickly get a unique list of all the mnemonics each dict has:
>>> {inst.mnemonic for inst in instructions.values()}
{'ADC',
 'ADD',
 'AND',
 'CALL',
 # ... etc ...
 'SUB',
 'XOR'}
And with that, you have a working list of opcodes. I recommend you write a pretty printer for the instruction and operands so you can see a textual representation like the template I showed you earlier.
Conclusion and Next Steps
- Opcodes and operands is the machine code that powers your computer
-
We’ve briefly covered what a CPU is and what it does – with far more to come – and what role opcodes and operands have. It’s the programming language for your CPU. But as I’ve shown, high-level languages like Python with its interpreted language; the bytecode that it emits when it’s compiled; and virtual machine it uses to run the bytecode, is not all that different from the role of a CPU.
- Hexadecimals, Binary and Numbers writ large
-
Hexadecimals are a programmer aid. They have little to do with computing except to aid us in reasoning about binary numbers, a topic I’ve not yet covered at all, as it deserves a thorough deep dive to truly understand them. Binary numbers are the lifeblood, so to speak, of the CPU.
- Emulation is the act of replicating the conditions that allow code to run unmodified on a different host
-
But with the caveat that not everything is so easily replicated! Getting things just right is as much a science as it is an art. It’s our goal to write a Game Boy emulator but with trade-offs around cycle-accuracy and performance.
- The Game Boy CPU is a hybrid of multiple different CPU types
-
I will refer to it as Z80 as it hews reasonably close to that CPU, but it’s not entirely the same. It’s a Sharp LR35902 and it’s definitely inspired by the Intel 8080 and the Z80. But there is no official reference documentation available online for that model, and most documentation you can find leads you back to Game Boy emulators.
If you want to read up on the Z80, remember that the Sharp has a different instruction set (but with a lot of overlap); and it’s missing a number of registers and flags.
Next Steps
In the next part we’ll look at writing a disassembler and put to use the opcodes we’ve just read in. Knowing how to represent the code the CPU is about to execute is an essential debug aid.


 Twitter
 LinkedIn