Game Boy Emulator: Writing the Z80 Disassembler
Let’s continue where we left off in the introduction to Game Boy Emulation with a deep dive into the Game Boy’s opcodes and operands – the language of the Z80 CPU – and how to make sense of it all.
As you’ll recall, the Z80 is an 8-bit CPU with a selection of 16-bit instructions, and each instruction has an associated opcode and zero or more operands used by the instruction.
Much later on we’ll implement the specifics of each instruction, but before we do, we need to understand how the Game Boy passes information to the CPU for processing; to understand that, we’ll start out with a quick run-through of what a cartridge ROM is, before moving on to writing our first piece of the emulator: a disassembler.
What is a Game Boy Cartridge ROM?
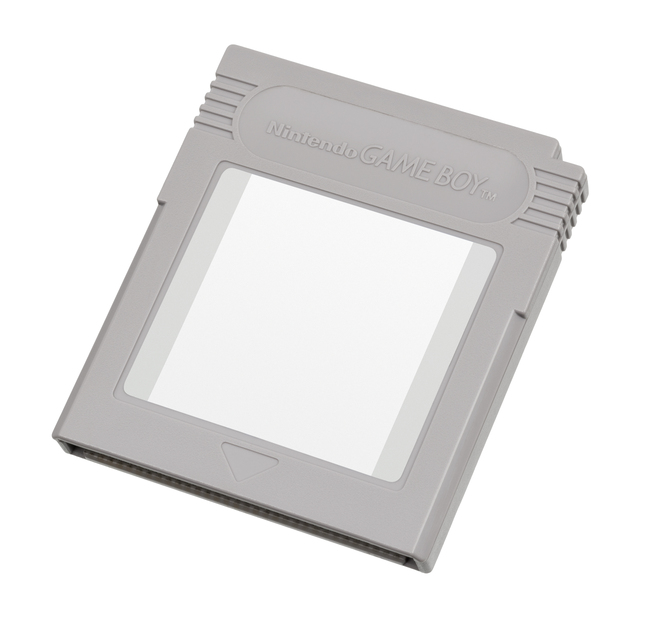
When you slot a cartridge into the back of the Game Boy it – somehow – boots up, and starts the game. Game Boy cartridges differ quite a bit depending on the game it was made for, the era it was created in, and the game developer who made it.
They all have some form of storage for the game’s code. Some of the larger games have more than one chip, and therefore need a memory bank controller in the cartridge, as the Game Boy only had a 16-bit address bus. The games could then switch between the chips, as needed. Later generations featured everything from camera attachments to accelerometers. Each of these features would in turn would simply write to dedicated areas of memory which the Game Boy could in turn read and the game’s code make use of. Simple, but effective.
Some also featured some sort of main memory, to store things like high scores and save games, and a small battery to keep a charge to said chip, to prevent data loss.
Laid out in full, the size of the cartridge’s effective storage ranged from 32 KiB to several MiB.
So, that’s a cartridge. A ROM – ROM being Read-Only Memory – is a catch-all term used in emulator circles to describe a clone of a cartridge, floppy disk, CD-ROM – anything, really – laid out in a format that emulator writers have agreed on over time. For simpler things it’s a 1:1 mapping. One byte in a chip somewhere; one byte in a file on your PC. Game Boy cartridges mostly work that way, which is good news for us.
To start with, and for quite a while actually, we won’t worry too much about complex memory bank switching and instead focus on games that don’t have any of those. They are easily identifiable in one of two ways: the size is 32 KiB exactly and the other we’ll talk about later when we look at how to read out cartridge ROM metadata.
I recommend you check out the Homebrew hub and pick a couple of simple games, like Snake.
- Cartridge ROMs are byte-accurate ROM images of the cartridge’s chips
-
So a cartridge ROM, then, is just a series of bytes lifted from one or more chips in a physical cartridge. And that’s exactly the representation we want, as it’s easy to reason about.
Reading a Cartridge ROM’s Metadata
Unpacking binary data with the struct module
Most languages come with some sort of notation for representing collections of typed data. In C, it’s struct. In Pascal, it’s record. It’s an efficient way of structuring information, especially as you can order the compiler (if there is one) to pack the structure in such a way that you have complete control over the layout of that structure, bit-for-bit, in memory and on disk. That’s a useful property when you want to represent collections of bytes, like we need to with the cartridge’s header metadata.
You can do this in myriad ways in Python. The problem, however, is that binary structures like this one requires an eye for precision: you need to not only read out the information byte-by-byte, but also take into account things like:
- Endianness, or the direction in which you read a sequence of bytes
-
Big and little endian systems interpret byte structures differently. The Z80 was a big endian CPU, and yours is probably little endian.
Type
sys.byteorderin your Python interpreter to tell for sure. - Signed vs Unsigned integers
-
Unsigned integers are positive integers only. Signed, on the other hand, is both negative and positive. The representation you pick will determine the value held in the byte string.
- Strings
-
Is it a C-style string or a Pascal-style? The former terminates a string with a NUL character to indicate the end is reached. But Pascal strings prefix theirs with the byte size of the string ahead of it.
- Size
-
Are you reading an 8-bit number or a 16-bit number? Perhaps an even larger one?
And the list goes on and on. In other words, the bits and bytes that make up our data is a matter of representation. Get it wrong, and you’ll read in garbage or, worse, it’ll work with some values but not others!
Luckily the struct module that ships with Python is equipped to deal all of these issues. Using a little mini-language, not unlike the one you’d use for format strings, you can tell Python how to interpret a stream of binary data.
Big and Little Endian
Let’s briefly talk about endianness and what it is. It plays a prominent role in how we read and represent information. It’s the order in which you read a sequence of bytes of data.
A term borrowed from the book, Gulliver’s Travels, of all places.
So consider the following hexadecimal string in Python:
>>> data = bytes.fromhex('AB CD')
>>> data
b'\xab\xcd'
When that byte string is represented as little or big endian, the decimal value changes. Recall that at this point it’s just a byte string; it has no meaning yet. That means the numerical value of the hexadecimal string AB CD is ambiguous if you don’t know whether the person who wrote it chose big or little endian!
Consider the variable, data, from before:
>>> little = int.from_bytes(data, 'little')
>>> big = int.from_bytes(data, 'big')
>>> (little, big)
(52651, 43981)
>>> (hex(little), hex(big))
('0xcdab', '0xabcd')
And that’s because the orientation of the data differs between the two endian formats. Little endian interprets it as CD AB and big endian as AB CD.
Now you might wonder why it’s CD AB and not DC BA — i.e., why is the boundary a byte and not half a byte?
The long and the short of it is that most CPUs are (at least) 8-bit addressable, meaning address bus will read and write at least 8 bits (or 1 byte) of data. The Game Boy has an 8-bit CPU but 16-bit addressable bus, so the smallest unit it operates on is 1 byte.
Weird CPU platforms may differ, and many did 50 years ago, but as far as we’re concerned, CPUs today operate on multiples of 8 bits.
To demonstrate, you can convert any decimal to a byte string padded to a given length in big or little endian. Here I am using hexadecimal notation to match one byte (the length keyword) of the example byte string from before.
>>> int.to_bytes(0xCD, length=1, byteorder='little')
b'\xcd'>>> int.to_bytes(0xCD, length=1, byteorder='big')
b'\xcd'As you can see, no byte transpositions took place. The reason is this: as the smallest unit we operate on is 8 bits, there’s no difference whether it’s read left to right or right to left; the word 0xCD is just 0xCD. Now it’s perfectly possible to have bit-level (as opposed to byte-level) endianness, where the order you read bits in changes. But that’s not the case here though.
Now again but with a size of 2 (i.e., 16 bits):
>>> int.to_bytes(0xCD, length=2, byteorder='big')
b'\x00\xcd'>>> int.to_bytes(0xCD, length=2, byteorder='little')
b'\xcd\x00'And now it did transpose (as per the rule from before) with Python helpfully padding the extra byte with 0x00 in little endian to ensure a system expecting 2 bytes of little endian-ordered data reads it properly.
Converting between Big and Little Endian
As the examples above demonstrate, you can let Python do the hard work of converting between big and little endian. But you can also swap them manually with bit shifting:
- Converting a 16-bit value between big and little endian with bit shifting
-
I won’t belabor the method just yet; rest assured, bit twiddling is on the menu later on when we start implementing the Z80’s instructions.
>>> value = 0xABCD
>>> hex(((value & 0xFF00) >> 8) | (value & 0xFF) << 8)
'0xcdab'
This method works with values larger than 16 bits, too, of course, with a few modifications.
- Converting arbitrary values between big and little endian with
int -
This method converts any integer to a byte string of the given byteorder –
littleorbig.>>> 0xC0FFEE.to_bytes(length=3, byteorder='big') b'\xc0\xff\xee' >>> >>> int.to_bytes(0xC0FFEE, length=3, byteorder='little') b'\xee\xff\xc0'Because integers are objects in Python, they come with an assortment of methods that you can invoke directly on them. I urge you to resist the temptation to do this with literal values and instead use
int. It’s far easier to read. - Using the
arraymodule -
The
arraymodule is a basic array implementation that ships with Python. You give it a size initializer (and more on what they mean in the next section) – a bit likedtypein numpy – and Python handles the rest. This method’s useful if you have an array full of values you want to swap.>>> a = array.array('H', b'\xAB\xCD\x00\x01') >>> a array('H', [52651, 256]) >>> a.byteswap() >>> a array('H', [43981, 1])
Byte strings and type representation
To start with, you’re going to want to collect all the fields represented in the Cartridge Header section in Pandocs and map each of them to the fields you see in struct format characters.
Mapping them to the fields is not hard, once you understand the basics. The main thing to remember, though, is that we only operate on bytes, like so:
>>> b'Inspired Python'
b'Inspired Python'
Byte strings are important here because no conversion to or from your computer’s locale takes place; it’s just the raw form, untouched by any conversions to UTF-8 or other character encodings.
Consider this byte string with a bunch of escape-encoded stuff in it:
>>> b'\xf0\x9f\x90\x8d'
b'\xf0\x9f\x90\x8d'>>> b'\xf0\x9f\x90\x8d'.decode('utf-8')
'🐍'When I decode it from its byte format into UTF-8 I get… a snake. So the byte string’s just a raw segment of bytes; it can mean anything until we give it purpose: converting it to UTF-8 yields a snake, but if I use struct.unpack_from I can tell Python that it must represent it as an unsigned integer instead:
>>> struct.unpack_from('I', b'\xf0\x9f\x90\x8d')
(2375065584,)
So that’s the crux of what we need to do with the Cartridge Header. We need to come up with a series of format string characters to give to unpack_from so it can work its magic.
Luckily we only need a couple of different ones:
| Format String | “C”-equivalent type | Purpose |
x
|
Pad Byte | Skips a byte or pads out another format string. Useful for stuff we don’t care about. |
=
|
Use your system’s native endian format | Probably what you want. Python will determine if it should use little or big endian when reading the data |
>, <
|
Big & Little Endian Indicator, respectively | Very important. The Z80 stores things in Big endian, so if our system is little endian we should tell it to represent it as little endian. Note: It must be the first character in the format string. |
s
|
Character Array |
Useful for arbitrary
lengths of text.
Takes a prefix to
indicate length, like
10s.
|
H
|
Unsigned Short | 2-byte unsigned integer |
B
|
Unsigned Char | Used as 1-byte unsigned integer |
So to use it, you can combine the format strings into a sequence of unpack instructions. Consider this simple example that pulls out a couple of numbers – in big endian – and a string:
>>> struct.unpack_from('>BB5sH', b'\x01\x02HELLO\x03\x04')
(1, 2, b'HELLO', 772)
Pay close attention to >. Try running the code with < instead and again with =.
The key thing to remember is this:
- You want to convert to your platform’s native endian format
-
I mean, you don’t have to, but you’ll have to deal with mentally and programmatically swapping things around all the time. Not fun.
So in our case, the Z80’s big endian, so you should convert it to little endian if your platform is also little endian. If it’s big endian, you don’t need to convert or change anything.
- Knowing the byte order is critical
-
If you don’t know the byte order of a binary file format, you’re kind of screwed. You can try to reverse engineer the likely byte order by looking for telltale signs of format types’ encoding, like twos-complement, floating point, ASCII strings, but it’s a slog.
With that in mind, let’s get on with the cartridge reader.
Game Boy Cartridge Metadata Reader
FIELDS = [
  (None, "="), # "Native" endian.
  (None, 'xxxx'), # 0x100-0x103 (entrypoint)
  (None, '48x'), # 0x104-0x133 (nintendo logo)
  ("title", '15s'), # 0x134-0x142 (cartridge title) (0x143 is shared with the cgb flag)
  ("cgb", 'B'), # 0x143 (cgb flag)
  ("new_licensee_code", 'H'), # 0x144-0x145 (new licensee code)
  ("sgb", 'B'), # 0x146 (sgb `flag)
  ("cartridge_type", 'B'), # 0x147 (cartridge type)
  ("rom_size", 'B'), # 0x148 (ROM size)
  ("ram_size", 'B'), # 0x149 (RAM size)
  ("destination_code", 'B'), # 0x14A (destination code)
  ("old_licensee_code", 'B'), # 0x14B (old licensee code)
  ("mask_rom_version", 'B'), # 0x14C (mask rom version)
  ("header_checksum", 'B'), # 0x14D (header checksum)
  ("global_checksum", 'H'), # 0x14E-0x14F (global checksum)
]
The format string to struct.unpack_from must be contiguous as it does not support newlines nor comments. To get around that, and to add a bit of clarity what would otherwise be a jumbled alphabet soup, I’ve built up a list of tuples, with each tuple holding the future attribute I want to reference the value by later. If it’s None it indicates that I do not want to store the value at all.
With that, the Cartridge Metadata is sort-of done — well, the hard part anyway. Now let’s write a quick test using Hypothesis before we delve into the code that does the actual reading.
Hypothesis uses clever algorithms to generate test data to try and break your code. It’s great. You can read more about property-based testing with Hypothesis here.
import sys
import hypothesis.strategies as st
from hypothesis import given

HEADER_START = 0x100
HEADER_END = 0x14F
# Header size as measured from the last element to the first + 1
HEADER_SIZE = (HEADER_END - HEADER_START) + 1

@given(data=st.binary(min_size=HEADER_SIZE + HEADER_START,
                      max_size=HEADER_SIZE + HEADER_START))
def test_read_cartridge_metadata_smoketest(data):
    def read(offset, count=1):
        return data[offset: offset + count + 1]

    metadata = read_cartridge_metadata(data)
    assert metadata.title == read(0x134, 14)
    checksum = read(0x14E, 2)
    # The checksum is in _big endian_ -- so we need to tell Python to
    # read it back in properly!
    assert metadata.global_checksum == int.from_bytes(checksum, sys.byteorder)
So there’s a bit to unravel here, so let’s start at the top. I’m defining a number of constants for use in the test. The beginning and end of the cartridge header are known values to you now: they’re taken from pandocs along with the other cartridge metadata FIELDS.
The test itself uses Hypothesis to generate a random assortment of binary junk of min_size and max_size equal to the size of the header plus its offset. I could just as easily offset everything by -0x100, though, but I like the idea that I’m also testing that we can read from the correct offset.
The test itself features read(), a helper function that reads count number of bytes from offset. Note that we need to add +1 because if offset = count = 1 then data[1:1] == ''.
The read_cartridge_metadata calls out custom code to read the metadata – more on that below – and checks that it reads a few of the fields. I’ve picked the title, as it’s a string, and the global checksum as it’s a two-byte field and endianness is therefore important to get right.
The final check ensures we read in the checksum as though it were big endian.
Now for the cartridge reader itself:
CARTRIDGE_HEADER = "".join(format_type for _, format_type in FIELDS)

CartridgeMetadata = namedtuple(
    "CartridgeMetadata",
    [field_name for field_name, _ in FIELDS if field_name is not None],
)

def read_cartridge_metadata(buffer, offset: int = 0x100):
    """
    Unpacks the cartridge metadata from `buffer` at `offset` and
    returns a `CartridgeMetadata` object.
    """
    data = struct.unpack_from(CARTRIDGE_HEADER, buffer, offset=offset)
    return CartridgeMetadata._make(data)
Yep. That’s it. CARTRIDGE_HEADER pulls out just the key in each tuple from FIELDS, and CartridgeMetadata is a namedtuple that we map each field_name into that is not None.
The struct.unpack_from function does most of the heavy lifting. It takes an optional offset that we default to the usual location of 0x100. The unpacked tuple of values are fed directly into CartridgeMetadata._make which turns the whole thing into a more accessible format:
>>> p = Path('snake.gb')
>>> read_cartridge_metadata(p.read_bytes())
CartridgeMetadata(
    title=b"Yvar's GB Snake",
    cgb=128,
    new_licensee_code=0,
    sgb=0,
    cartridge_type=0,
    rom_size=0,
    ram_size=0,
    destination_code=1,
    old_licensee_code=0,
    mask_rom_version=45,
    header_checksum=66,
    global_checksum=51166,
)
And that’s it for the cartridge metadata reader.
- Endianness is important
-
But only if you represent more than a single byte at a time. The Z80 CPU is Big Endian, so keep that in mind when you read in values. If you’re using a little endian CPU (
sys.byteordertells you which) then that’s what you should ask for! - All the pieces matter
-
The cartridge metadata has some use in our emulator, but it’s also a great tutorial to test and improve you knowledge of low-level constructs like the binary representation of things. It’ll come in handy later, and it’s a nice and easy way to ease your way into it.
- Python can easily represent, and convert between, the representations we’ll need for the emulator
-
Hexadecimals, big and little endian, binary, and any number of structured binary formats are all possible thanks to a number of, admittedly hidden, method calls.
The Z80 Instruction Decoder and Disassembler
A brief but important interlude.
Throughout the course I have referred to the CPU as Z80 (or Z80-style) as it is similar to the CPU in the Game Boy. But it is not entirely the same: it’s an Intel 8080-like Sharp CPU called LR35902. I will instead use the term Z80 even though it’s not 100% truthful. The reason for that is there’s scant documentation for the Sharp CPU on the internet except references to just the Game Boy. If you want to discover more literature on the CPU, your best bet is to search for Z80 as it’s a very common model of CPU. Keep in mind that the opcodes and some of the other CPU details do differ, though.
With a decent understanding of how the representation of a sequence of bytes depends on the context, let us now turn our attention to the disassembler.
One salient point before I proceed. The CPU emulator does not actually need a disassembler at all; but you will. The CPU only cares about decoding instructions from the byte stream, and it does not care about displaying them for humans to read on a screen. But, good debugging and instrumentation facilities is paramount to a successful emulator project. And the best place to start is with the disassembler (and decoder) as you’ll want to understand the instructions the CPU is about to emulate, and why.
In Game Boy Emulator Introduction we parsed the opcodes file and there was an optional task to pretty print the opcodes also. We’ll need those parsed dictionaries of opcodes for this next step. I opted for dataclasses; they look like a little bit like this:
Instruction(
    opcode=0x0,
    immediate=True,
    operands=[],
    cycles=[4],
    bytes=1,
    mnemonic="NOP",
    comment="",
)
We need two dictionaries of instructions. One for the prefix instructions, and another for the regular instructions. There are two because it is not possible to represent all the different instructions with just a single byte. The prefixed instructions are thus, well, prefixed with 0xCB to indicate to the CPU that the byte following that one is the prefixed instruction.
So CB 26 has the mnemonic of SLA (HL). You can see a list of the CPU Instruction Sets on pandoc and, of course, in your parsed dictionaries. I also recommend you keep the Game Boy CPU Manual on hand as it has more detailed explanations of the instructions.
So now that we have a list of opcodes it’s a case of mapping a stream of bytes to their opcode equivalents. There are, however, a couple of snags that make it infeasible to use the struct approach we used above:
- The byte lengths of the instructions are not fixed
-
Each instruction size varies from one to two bytes. All prefixed instructions are by their nature two bytes long.
- Opcodes are variadic
-
Some opcodes have operands, and others do not.
0x0(NOP) has no operands, for instance. ButCB 26has one. Some also reference a special memory location, further lengthening the amount of bytes to read. - The offset you read from is unknown
-
Maybe you’re reading from
0x0, or perhaps another offset. - The stream is potentially infinite
-
This is not the case when we disassemble a cartridge ROM (it has a fixed size), but it could happen once our emulator starts executing instructions, and we’d have no easy way of knowing, either .
It’s known as The Halting Problem.
So it’s much easier to take what we’ve learned and go about reading the data in one byte at a time, using the parsed opcodes as a guide for what we need to read.
So the goal is roughly:
-
Given an address (think index in an array of bytes) and our parsed opcodes, read one byte and increment address by 1
-
If the byte equals
0xCB, use the prefix instructions opcode lookup table, and increment the address by 1. -
Get the instruction from the opcode lookup table
-
Loop over the instruction’s operands and:
-
If the operand has
bytes > 0, read that many bytes and increment the address by the same and store it as thevalueof the operand. -
If it
bytes is Nonefield, then the operand is not data value and a fixed operand, so store that instead inname.
-
-
At this point you’ll have an instruction and associated operands, if any. Return the address and the instruction.
-
Ensure that any value you read is converted to your system’s byteorder. Use
sys.byteorder
The point of the exercise is to translate strings of bytes into the equivalent high-level instruction that both the CPU and us, the developers, can comprehend. Because the byte length varies depending on the opcode, we cannot simply chunk the stream into packets of instructions to parse.
Let’s start with a test for the NOP instruction:
@pytest.fixture
def make_decoder(request):
    def make(data: bytes, address: int = 0):
        opcode_file = Path(request.config.rootdir) / "etc/opcodes.json"
        return Decoder.create(opcode_file=opcode_file, data=data, address=address)
    return make

def test_decoder_nop_instruction(make_decoder):
    decoder = make_decoder(data=bytes.fromhex("00"))
    new_address, instruction = decoder.decode(0x0)
    assert new_address == 0x1
    assert instruction == Instruction(
        opcode=0x0,
        immediate=True,
        operands=[],
        cycles=[4],
        bytes=1,
        mnemonic="NOP",
        comment="",
    )
Here I’m using a pytest factory fixture to generate the Decoder object that’ll do all the heavy lifting. The test, then, generates a decoder with a bytestring \x00. Next, I ask the decoder to decode address 0x0 (which is of course the first and only byte in our bytestring) and assert that the instruction matches the one I got from my parsed opcodes file, and that the address returned by the decoder reflects the new position: 0x1.
Now for the decoder. Let’s start with the constructor and the skeleton of the class.
@dataclass
class Decoder:

    data: bytes
    address: int
    prefixed_instructions: dict
    instructions: dict

    @classmethod
    def create(cls, opcode_file: Path, data: bytes, address: int = 0):
        # Loads the opcodes from the opcode file
        prefixed, regular = load_opcodes(opcode_file)
        return cls(
            prefixed_instructions=prefixed,
            instructions=regular,
            data=data,
            address=address,
        )
The Decoder requires data to decode. Later we’ll replace the generic concept of “data” with the emulator’s memory banks. For now, a generic bytestring is a decent stand-in.
There’s also an address that we encapsulate so we can later query the last position it had. Not needed just yet, but useful to have around. Finally there are two dictionaries containing the parsed opcodes.
The create classmethod is a factory that reads in the opcode file and calls load_opcodes (not shown) that parses the JSON opcodes file. It also takes two other parameters to seed the Decoder with data and a starting address.
Random aside: I recommend you avoid cramming code with side effects into __init__ constructors as it’s almost always a code smell. If creating or talking to other things is part of the contract of the class, you should instead put it into a @classmethod that does it for you, like I do here.
Now you can create an instance of Decoder directly and pass in faked dictionary values without having to patch out, or feature switch, the load_opcodes call like you’d otherwise have to if you had it in __init__.
And now for the meat of the class. The decoder method itself.
import sys

@dataclass
class Decoder:

    # ... Decoder continued ...

    def read(self, address: int, count: int = 1):
        """
        Reads `count` bytes starting from `address`.
        """
        if 0 <= address + count <= len(self.data):
            v = self.data[address : address + count]
            return int.from_bytes(v, sys.byteorder)
        else:
            raise IndexError(f'{address=}+{count=} is out of range')

    def decode(self, address: int):
        """
        Decodes the instruction at `address`.
        """
        opcode = None
        decoded_instruction = None
        opcode = self.read(address)
        address += 1
        # 0xCB is a special prefix instruction. Read from
        # prefixed_instructions instead and increment address.
        if opcode == 0xCB:
            opcode = self.read(address)
            address += 1
            instruction = self.prefixed_instructions[opcode]
        else:
            instruction = self.instructions[opcode]
        new_operands = []
        for operand in instruction.operands:
            if operand.bytes is not None:
                value = self.read(address, operand.bytes)
                address += operand.bytes
                new_operands.append(operand.copy(value))
            else:
                # No bytes; that means it's not a memory address
                new_operands.append(operand)
        decoded_instruction = instruction.copy(operands=new_operands)
        return address, decoded_instruction
I think the read method speaks for itself. If we attempt to read beyond the bounds of the bytestring, raise an IndexError, otherwise return count number of bytes from address.
The decode method follows the algorithm I laid out above. We read one byte at a time, remembering to increment address when we do, and if there are operands associated with the matching instruction, we read an additional operand.bytes (again incrementing address) and store it in operand.value. If operand.bytes is None we instead just store the operand as-is.
The reason for the bytes is not None check has to do with how the opcode table in the JSON file is laid out. Not all operands are parametric and require additional bytes to read. If they have no bytes to read, we still want the operand.
Both dictionaries of instructions contain instances of the Instruction dataclasses that I defined in Instruction and Operand Dataclasses. The only thing to note is the copy methods that return an identical copy of the Instruction or Operand instances, but with the value (for Operand) or operands (for Instruction) swapped out.
I also added a couple of pretty printers to both the Operand and Instruction classes:
@dataclass
class Operand:

    # ... etc ...

    def print(self):
        if self.adjust is None:
            adjust = ""
        else:
            adjust = self.adjust
        if self.value is not None:
            if self.bytes is not None:
                val = hex(self.value)
            else:
                val = self.value
            v = val
        else:
            v = self.name
        v = v + adjust
        if self.immediate:
            return v
        return f'({v})'

@dataclass
class Instruction:

    # ... etc ...

    def print(self):
        ops = ', '.join(op.print() for op in self.operands)
        s = f"{self.mnemonic:<8} {ops}"
        if self.comment:
            s = s + f" ; {self.comment:<10}"
        return s
The printer code is self-explanatory. The goal is to format an instruction (and any operands) to look like hand-written assembly code. There’s a style to it, and you can see it’s more or less the same in all the Game Boy and Z80 Assembly language manuals.
With a pretty printer and working decoder we’re almost done:
>>> dec = Decoder.create(opcode_file=opcode_file, data=Path('bin/snake.gb').read_bytes(), address=0)
>>> _, instruction = dec.decode(0x201)
>>> instruction
Instruction(opcode=224, immediate=False, operands=[
    Operand(immediate=False, name='a8', bytes=1, value=139, adjust=None),
    Operand(immediate=True, name='A', bytes=None, value=None, adjust=None)
    ], cycles=[12], bytes=2, mnemonic='LDH', comment='')
>>> instruction.print()
'LDH      (0x8b), A'
Generalizing this to a function capable of disassembling an arbitrary length of bytes is now easy:
def disassemble(decoder: Decoder, address: int, count: int):
    for _ in range(count):
        try:
            new_address, instruction = decoder.decode(address)
            pp = instruction.print()
            print(f'{address:>04X} {pp}')
            address = new_address
        except IndexError as e:
            print('ERROR - {e!s}')
            break
Which, when run with the offset of 0x150 (which happens to be entrypoint for snake.gb):
>>> disassemble(dec, 0x150, 16)
0150 NOP
0151 DI
0152 LD       SP, 0xfffe
0155 LD       B, 0x80
0157 LD       C, 0x0
0159 LDH      A, (0x44)
015B CP       0x90
015D JR       NZ, 0xfa
015F DEC      C
0160 LD       A, C
0161 LDH      (0x42), A
0163 DEC      B
0164 JR       NZ, 0xf3
0166 XOR      A
0167 LDH      (0x40), A
0169 LD       A, 0x0
And that’s it. A working disassembler. Advanced ones like Ghidra and IDA Pro come with a battery of additional features like figuring out call graphs, where functions begin and end, and so much more. But this is enough for us to begin to understand what our future emulator CPU is executing.
We’re now ready to tackle the next part of the equation: writing the framework that will make up our CPU; the CPU registers (and what they are); and a crash course on Z80 assembly language to get us started.
Summary
- Representation is a matter of interpretation
-
Big and little endian is one thing to be aware of. Another is that a consecutive series of bits and bytes can mean different things. And we’ve only scratched the surface. Later on the concept of signed and unsigned numbers and how to represent them rears its head.
- Disassemblers are key to CPU emulation
-
If you’ve never done systems programming before, then the thought of writing a disassembler may seem difficult or challenging: and they definitely can be, if you have to reverse engineer the opcodes and operands! We’ve been given a big leg up because someone has carefully transcribed the opcodes and operands into parseable JSON. Without it, we’d have to do that tedious manual work first.
But even though pretty-printed disassembly is useful to us, the developers, the CPU still needs to go through what is known as a “Fetch-Decode-Execute” cycle. We’ve simplified the fetching, for now, as it does not read from memory yet. But the decoder is complete and it’ll serve as a keystone in the emulator going forward.


 Twitter
 LinkedIn